Tampilkan postingan dengan label Tutorials Virtual Machine. Tampilkan semua postingan

Rabu, 17 Desember 2014

How To Install Mac OS X Mountain Lion Virtual Machine (VMware) inside Windows 7 or Windows 8

Apple released its latest Mac OS X, Mountain Lion, at the end of July, 2012. That means, “Hackintosh” community has a new kid in town to play around. If you are new to the topic of Hackintosh, then be SURE to check out some of our awesome guide on What is hackintosh? How to build a hackintosh from hardware selection to software installation.
This guide will help you go through step-by-step installation of the latest Mac OS X Mountain Lion.
Requirements:
  • You must have an Intel CPU, if you have an AMD CPU then this will NOT working for you.
  • Check make sure your Intel CPU has virtualization technology and is enabled from your BIOS, find out how click here?
  • At least 4GB of RAM (you can still run with less RAM but you will suffer performance issues)
  • At least 20 GB of Hard Disk space
  • VMware Workstation 8 / Workstation 9, (WMware Player might work as well, for optimal performance Workstation works better)
  • IMPORTANT: Download OS X 10.8 Mountain Lion Retail VMware Image (from your favorite place)
  • Optional: VMware Tools for VMware OS X

How To Install Mac OS X Mountain Lion in VMware Workstation on Windows Machine

Step 1
Extract the OS X 10.8 Mountain Lion Retail VMware Image.7z file. Once you’ve done that, you will see three folders created at the location you have extracted the file.

OS X 10.8 Mountain Lion folder contains the Mountain Lion vmdk and vmx file for your VMware.
VMware Unlocker – Hardware Virtualization Bypasser folder is for people who have legacy machines that doesn’t support Intel Virtualization, then this tweak can help you by pass the restriction with VMware. Use this ONLY when you have failed to install and the warning message is on your unsupported Virtualization CPU.
VMware Unlocker – Mac OS X Guest you need this to unlock Mac OS X Operating System in VMware Workstation. It should includes support for VMware Workstation 7 and 8. If you have Workstation 9 then it would also work, just run the unlocker for WMware Workstation 8 and you should be good to go.
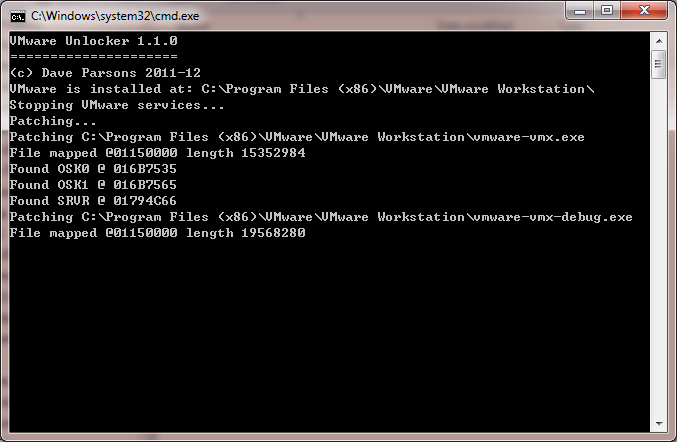
Step 2, Run VMware Workstation Unlocker
Navigate into the VMware Unlocker – Mac OS X Guest  folder > VMware 8.x Series > VMware Workstation Unlocker – Windows
Run install.cmd. Alternatively you can also try to use this VMware Unlocker if it has failed on you.
2012-08-25_1014
After you have successfully unlocked Mac OS X Operating System. Your VMware Workstation will now recognize Mac as a new OS. Start VMware Workstation, I’m using the newly released Workstation 9 here as an example. Go to File > Open
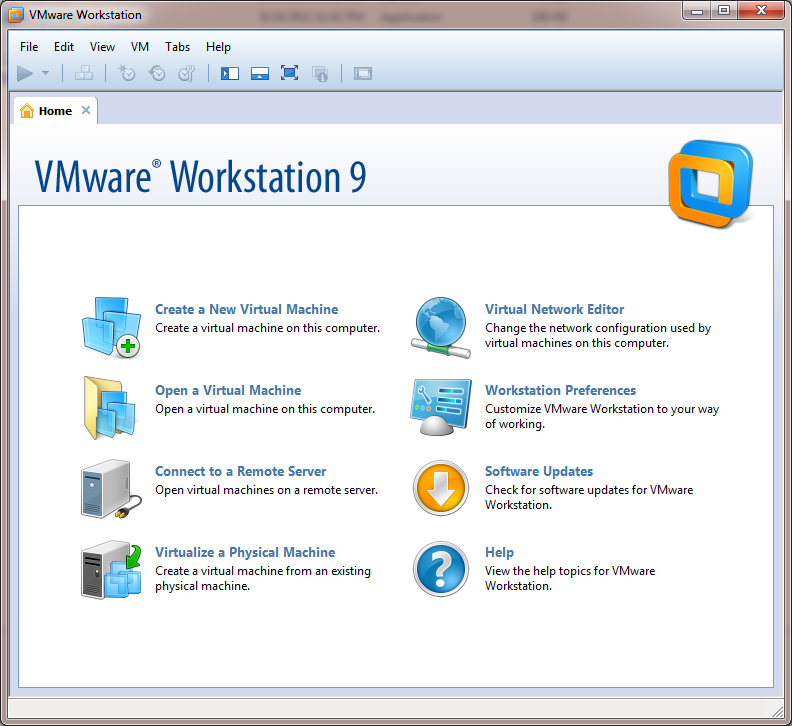
2012-08-25_1002
Navigate to OS X 10.8 Mountain Lion. You should be able to see OS X 10.8 Mountain Lion.vmx
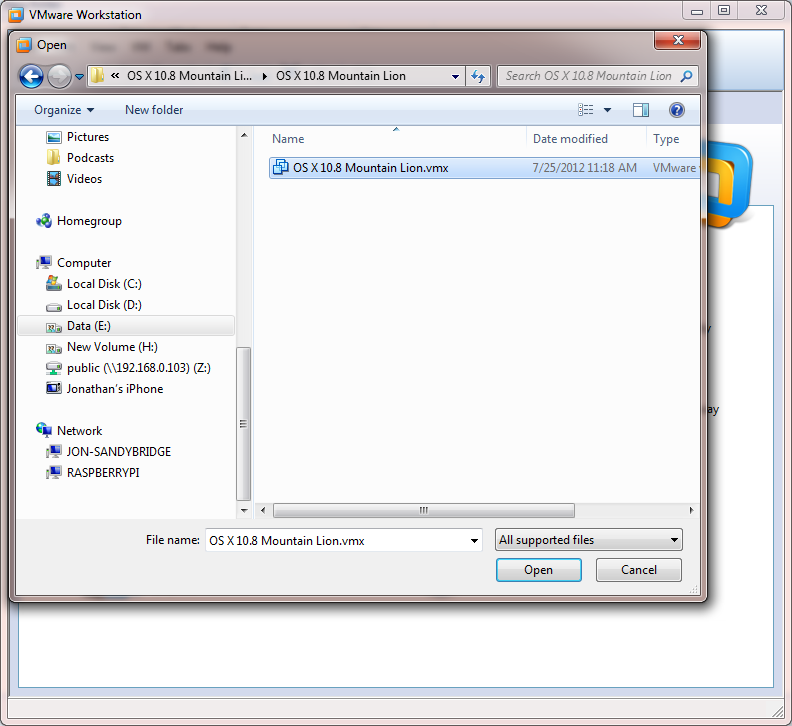
2012-08-25_1016
Open it.
Step 3, Configure Virtual Machine settings for OS X 10.8 Mountain Lion
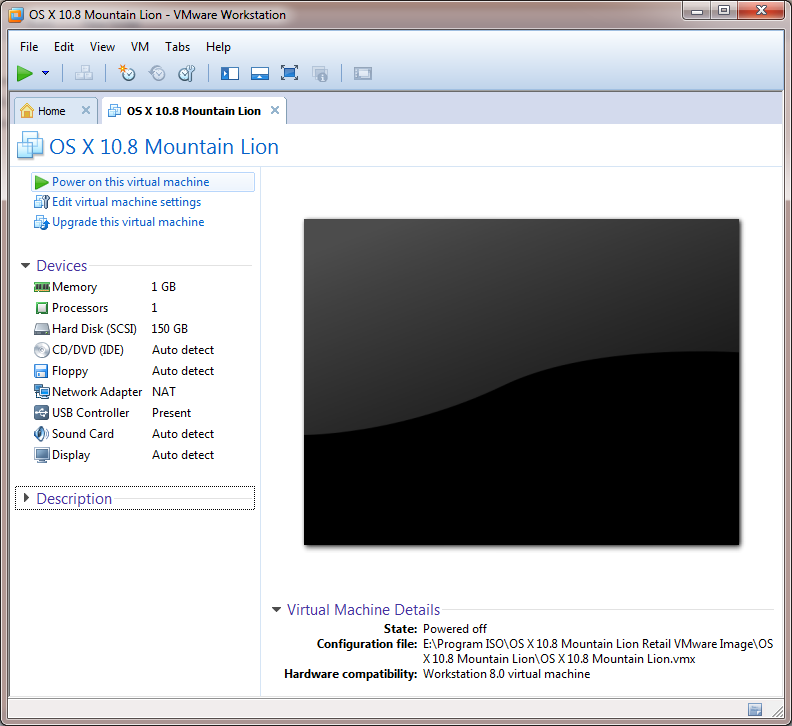
2012-08-25_1017
If you are running VMware Workstation 9. You will see an option to upgrade this virtual machine. You can do that to make this Virtual Machine more compatible with your latest Workstation. Alternatively, you can discard the message. But you want to go to edit virtual machine settings, go to Options tab. Change the version to Mac OS X 10.8 64-bit.
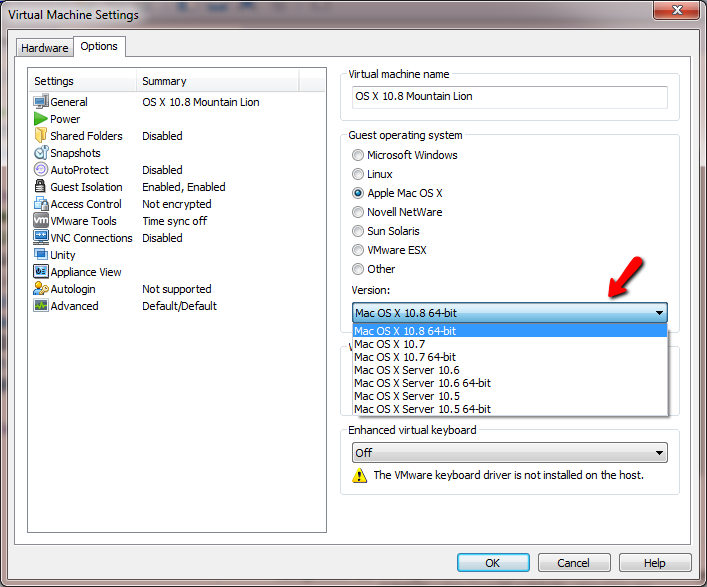
2012-08-25_1017_003
Step 4, Start up the Virtual Machine
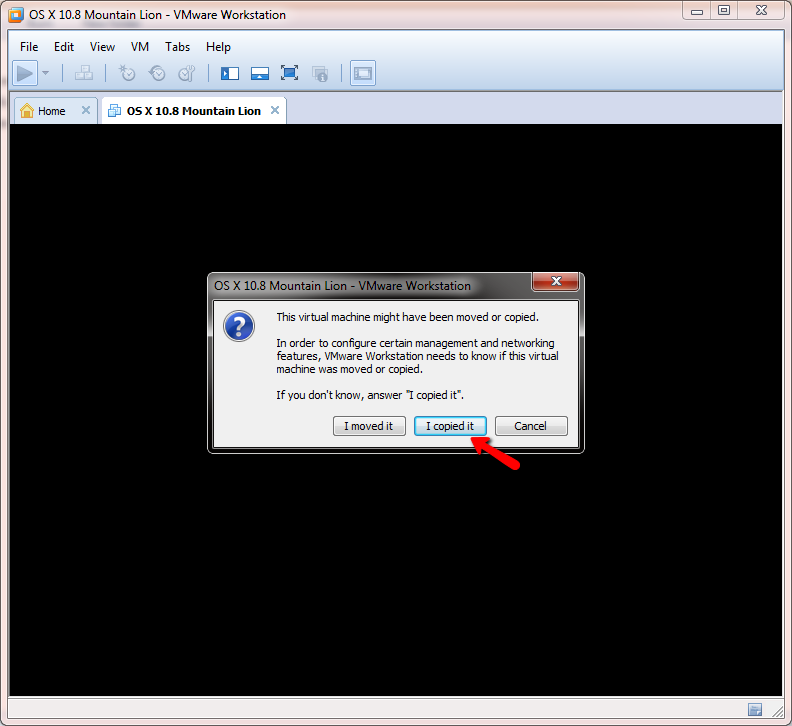
It will ask you if this virtual machine is moved or copied. Just click I copied it.
2012-08-25_1017_004
Now let the fun part begin. VMware Workstation will now boot your VMDK image, this process might take anywhere between 1 minutes to few minutes. Depends on the system you are trying to install. If you ever run into issues, be sure to check out this guide on how to troubleshoot hackintosh.
2012-08-25_1018
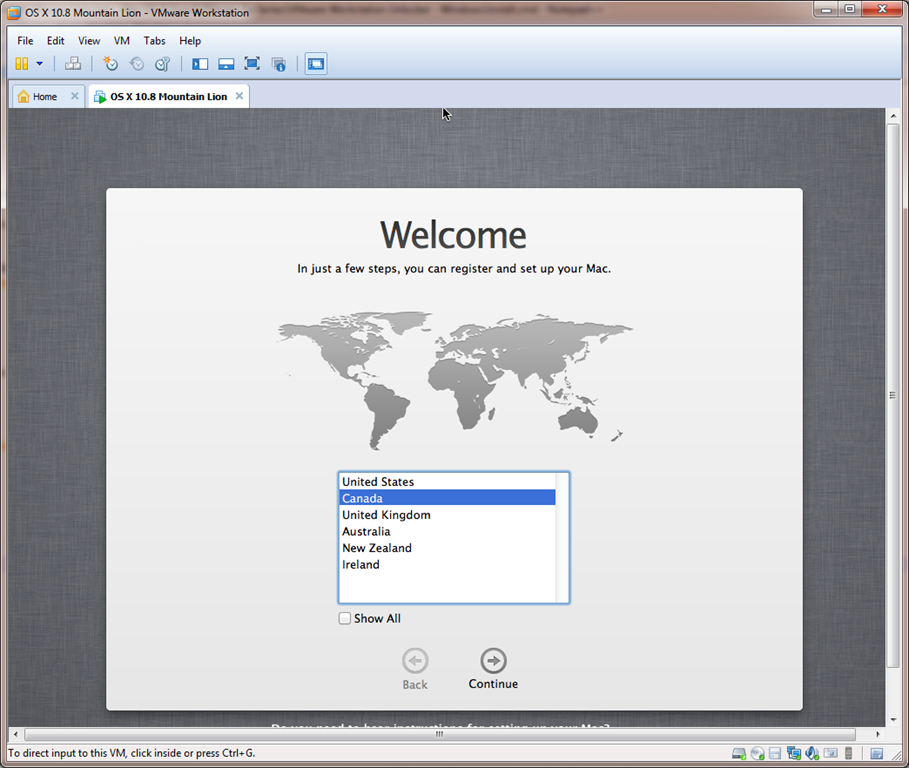
Step 5, Complete Welcome screen and initial setup
Now it should be very straight forward, just keep following the setup wizard and complete the installation.
2012-08-25_1020
Step 6 Optional Install VMware Tools
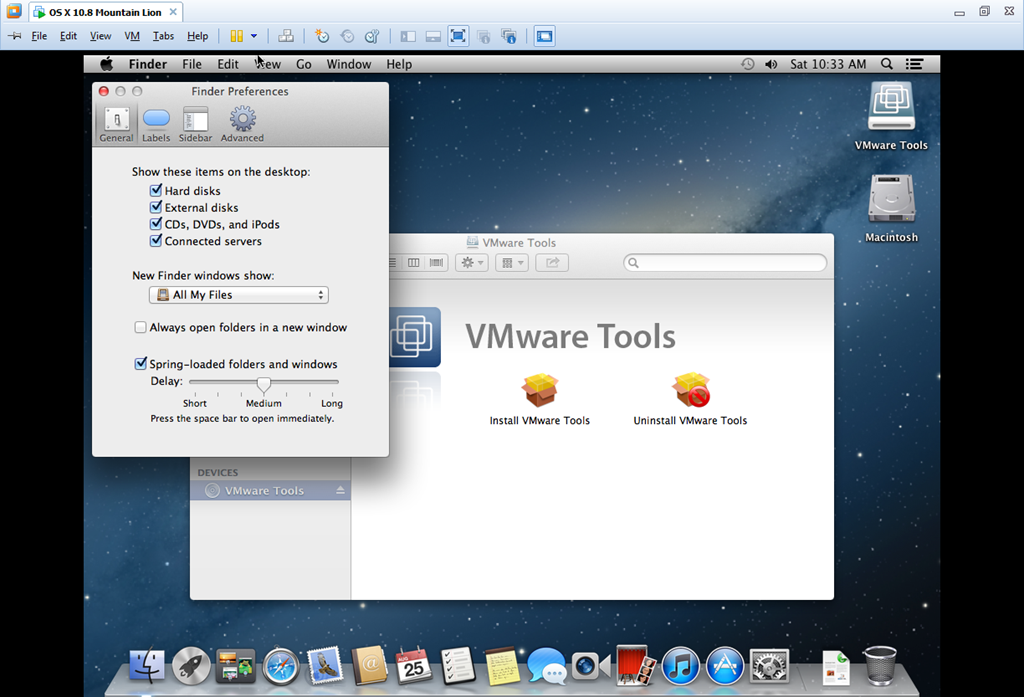
Once the installation is complete, inside your new Mac. Mount the darwin.iso image. Install the VMware Tools to optimize your system.
2012-08-25_1033
I personally have trouble to get the VMware tools to properly installed under VMware Workstation 9. You might have more luck to try to install on other versions of VMware workstation. That’s it, if you are at this step, congratulations you just got yourself a new Mac running inside a Windows Machine !
If you don’t feel like to be an early adopter, we have an excellent guide on how to install Mac OS X Lion as a virtual machine in your Windows machine, be sure to check that out as well.

How to install Kali Linux in virtual machine step by step

Installing kali linux( backtrack 6 ) is not much harder as it was in down 1,2,3 versions of backtrack but anyway if you are stuck some where this step by step guide to install kali linux under virtual machine . why virtual machine ? because it gives you a safe environment to play and explore without damaging your physical hard drive , or any data loss what you should know before continue :
  • basic knowledge of virtual machine’s
  • basic knowledge of networking concepts ( TCP IP )
  • basic linux or any *nix ( if you ever worked on Linux then you are good to go )
  • time and patience
what is required :
  1. Download Kali LinuxISO
  2. virtual machine ( i am using VMware workstation in tutorial , if you have virtualbox or vmplayer then its good installation process is pretty same in every virtual platform )
Installation Process :
1 : click on create new virtual machine
create new virtual machine
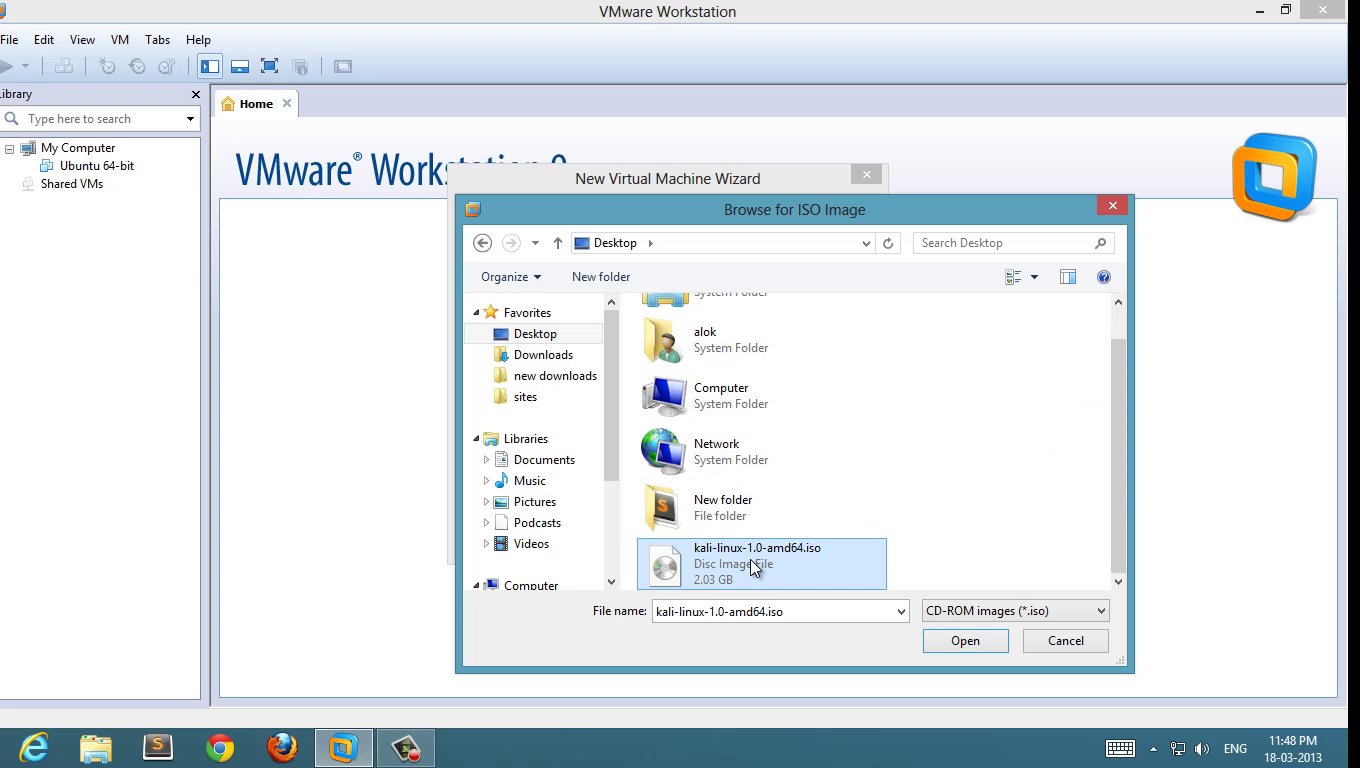
2 : choose ISO

choose kali linux ISO
choose ISO

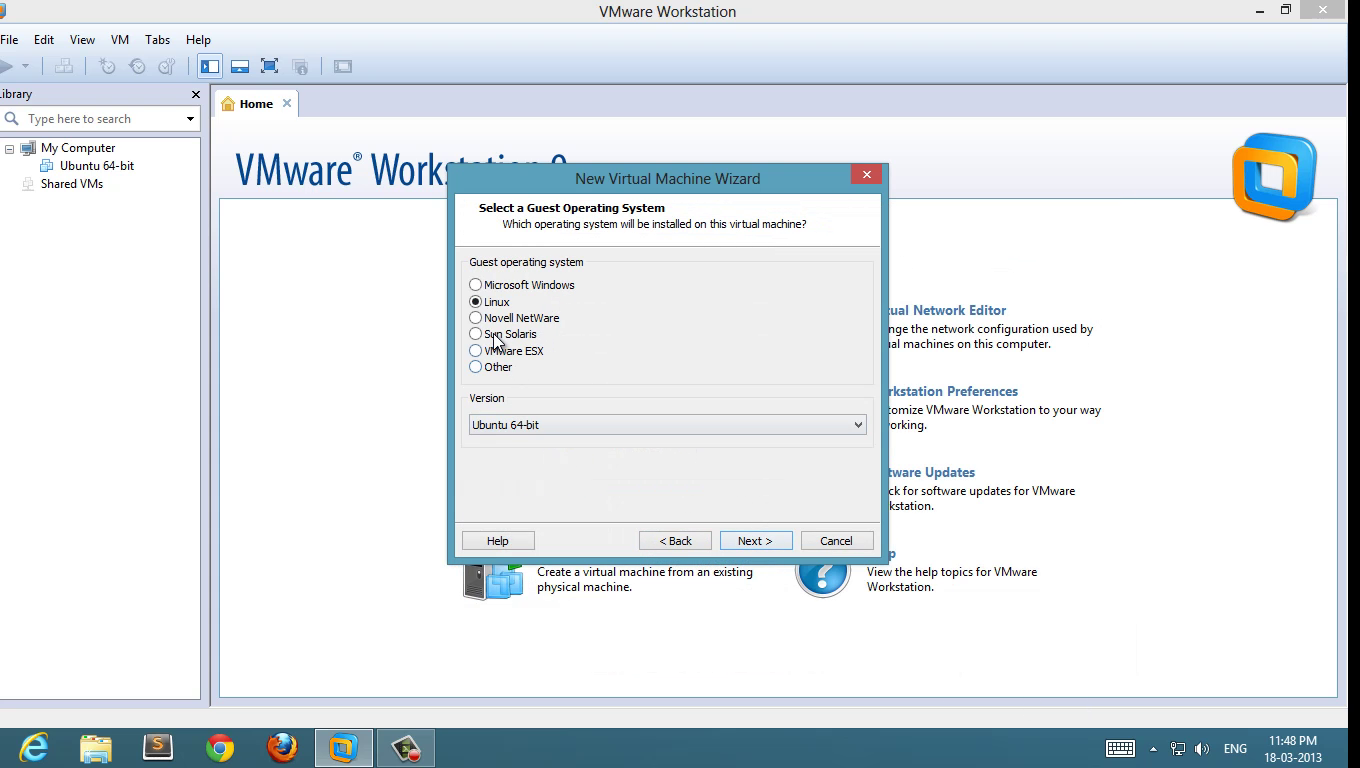
3 : Select Guest Operating System

select guest operating system

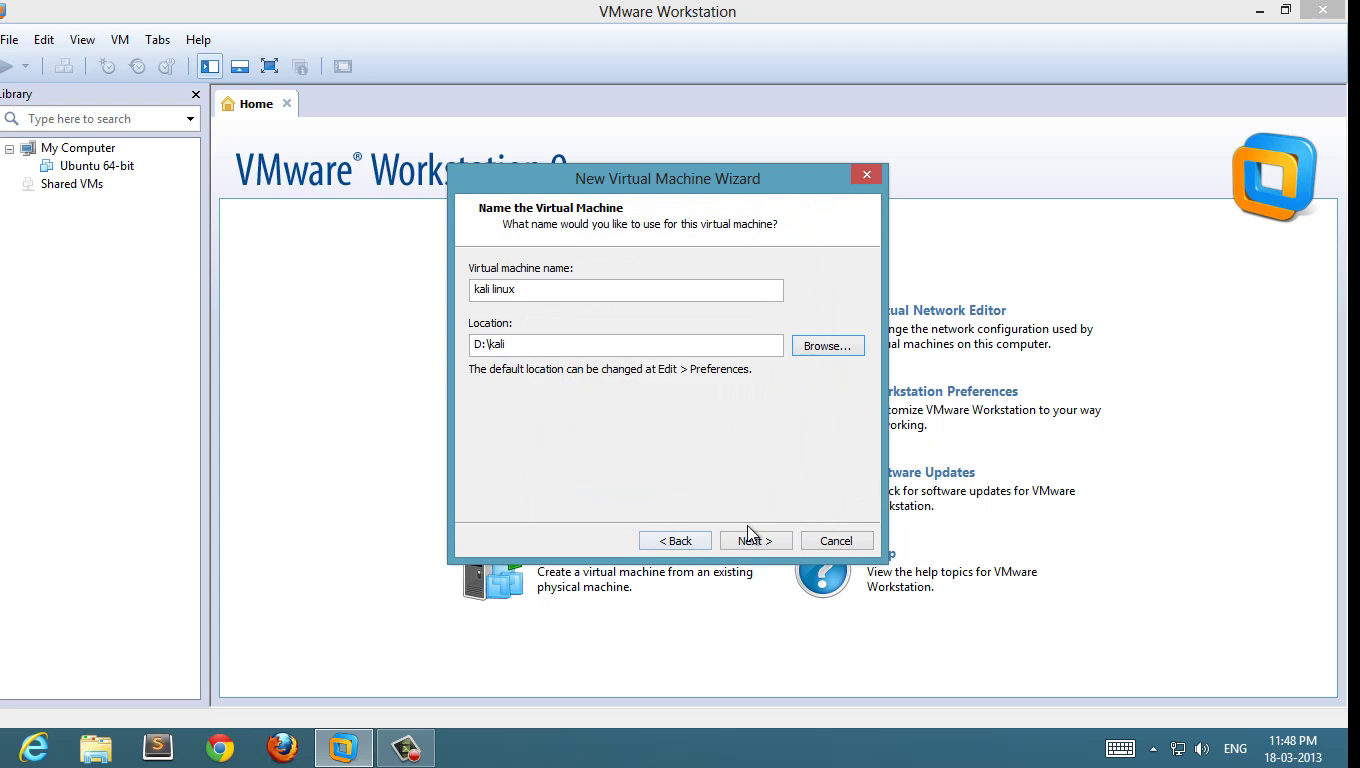
4 : Set name and location 
kali-linux4
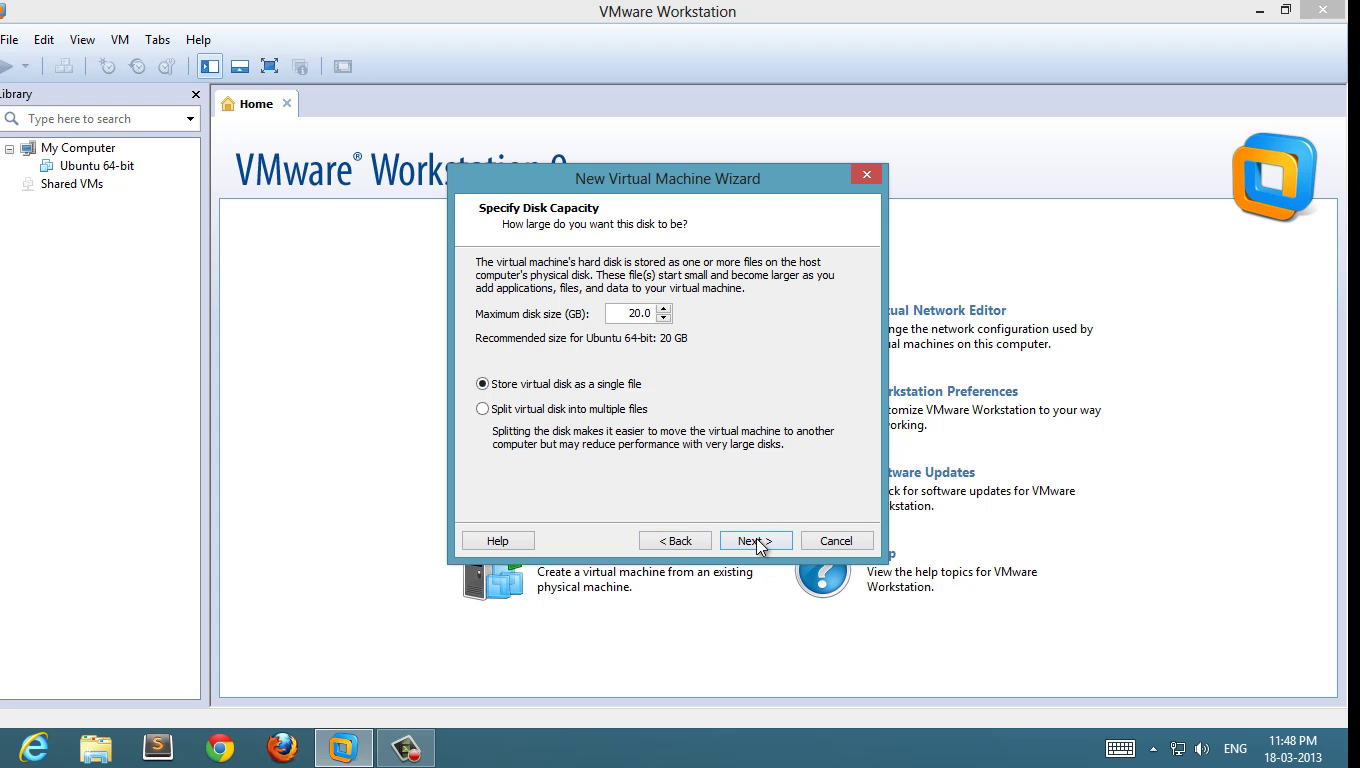
5 : Set disk space ( 20 GB is good enough, minimum 12 GB to work smoother )
kali-linux-5
5 : Review the hardware configuration and start the virtual machine 

kali linux install guide
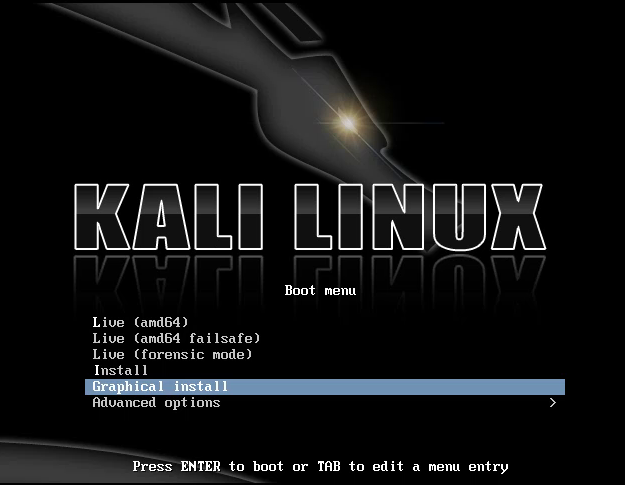
Select Graphical Install

6 :  Select Graphical Install go through normal language and timezone host-name selection etc
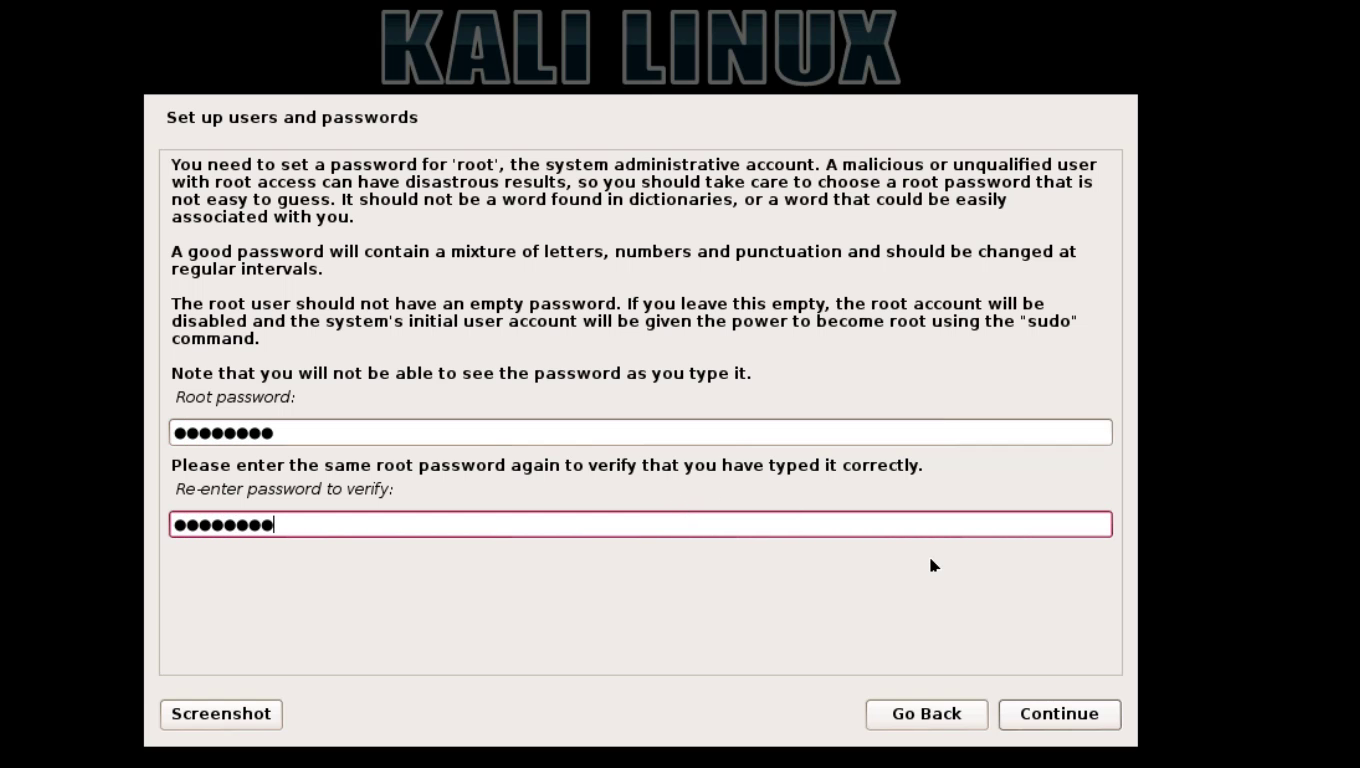
Set your “root” password and don’t forget it

set root password and dont forget it
set root password and don’t forget it

7 : Disk Partition  ( if you are installing freshly without any dual boot then simply use guided and use full virtual disk )

use full virtual disk

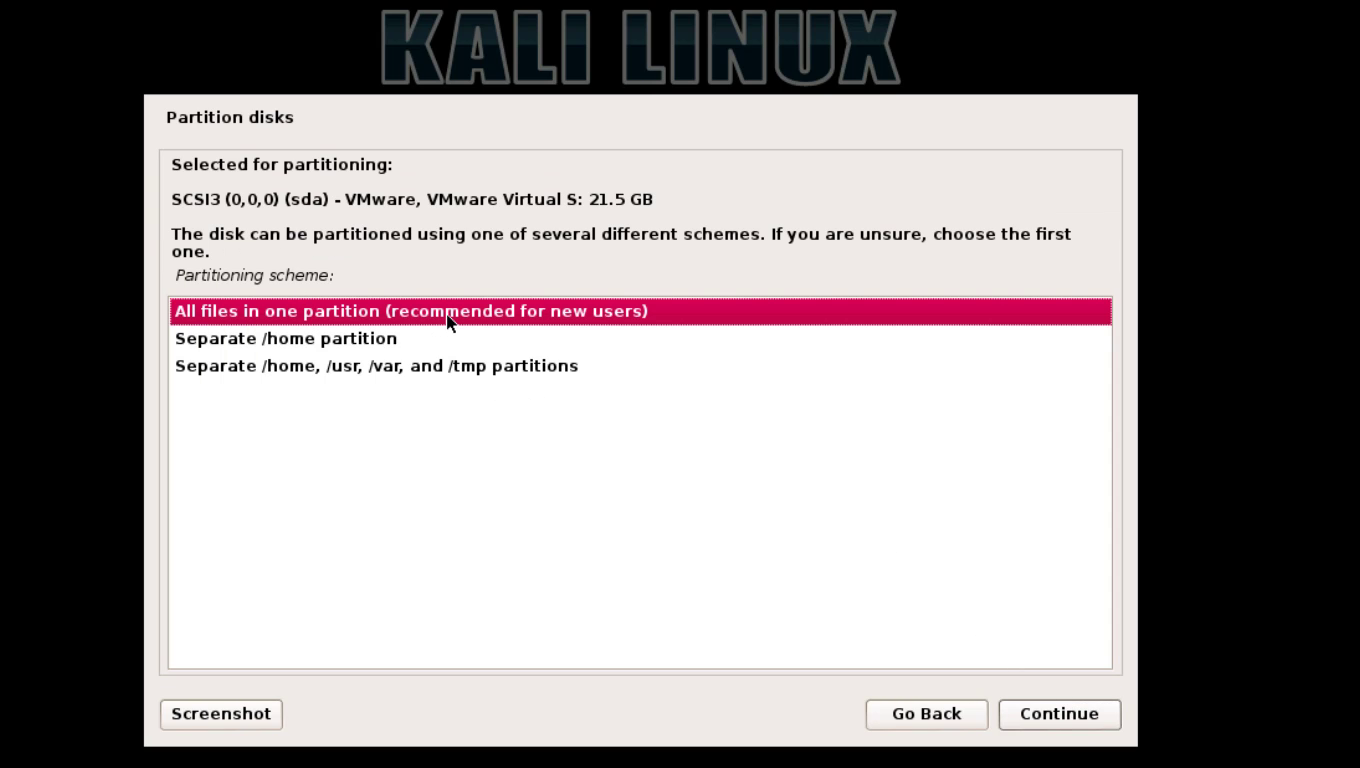
8: Select hard-drive and select all-in-one  ( for new users ) or if you don’t know just choose all in one 

use full virtual disk

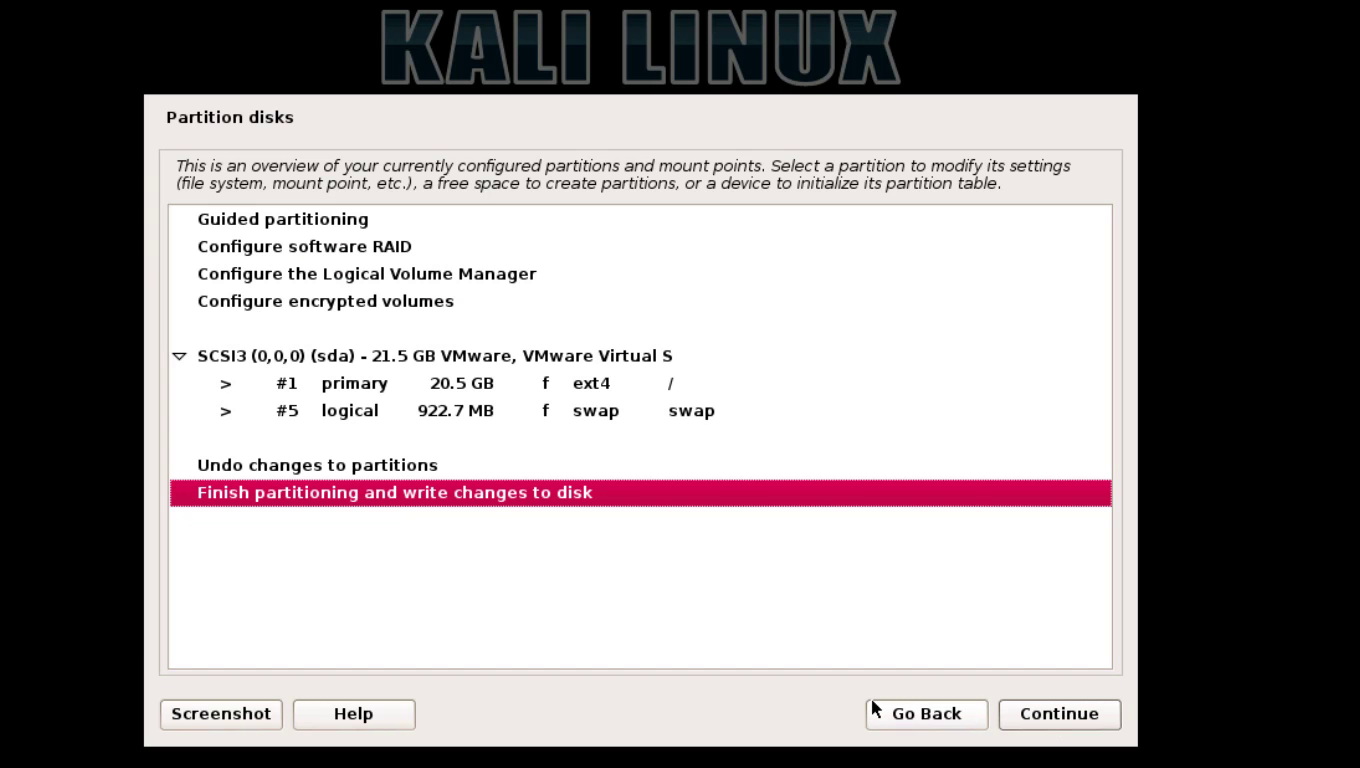
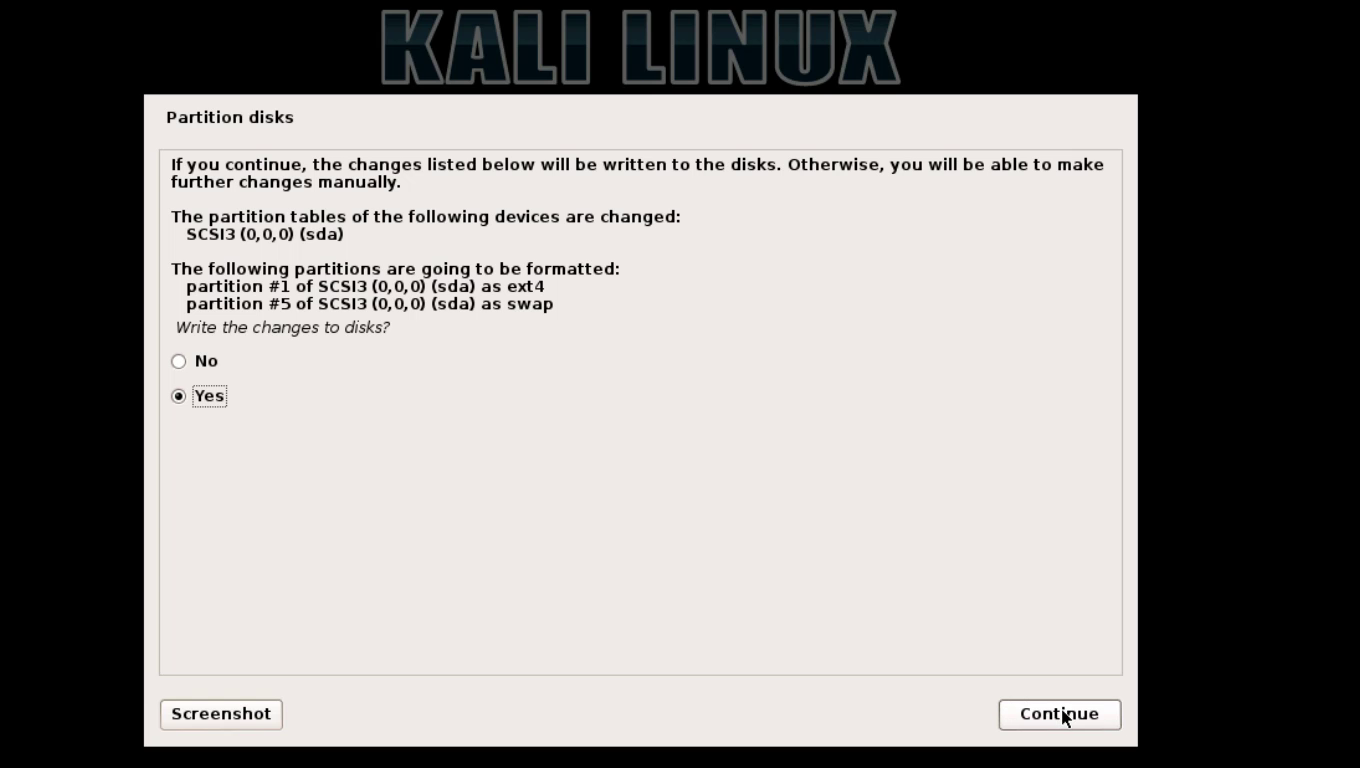
9 :  click on finish partitioning and write changes to disk  , choose yes to write 
kali-linux-17
kali-linux-18
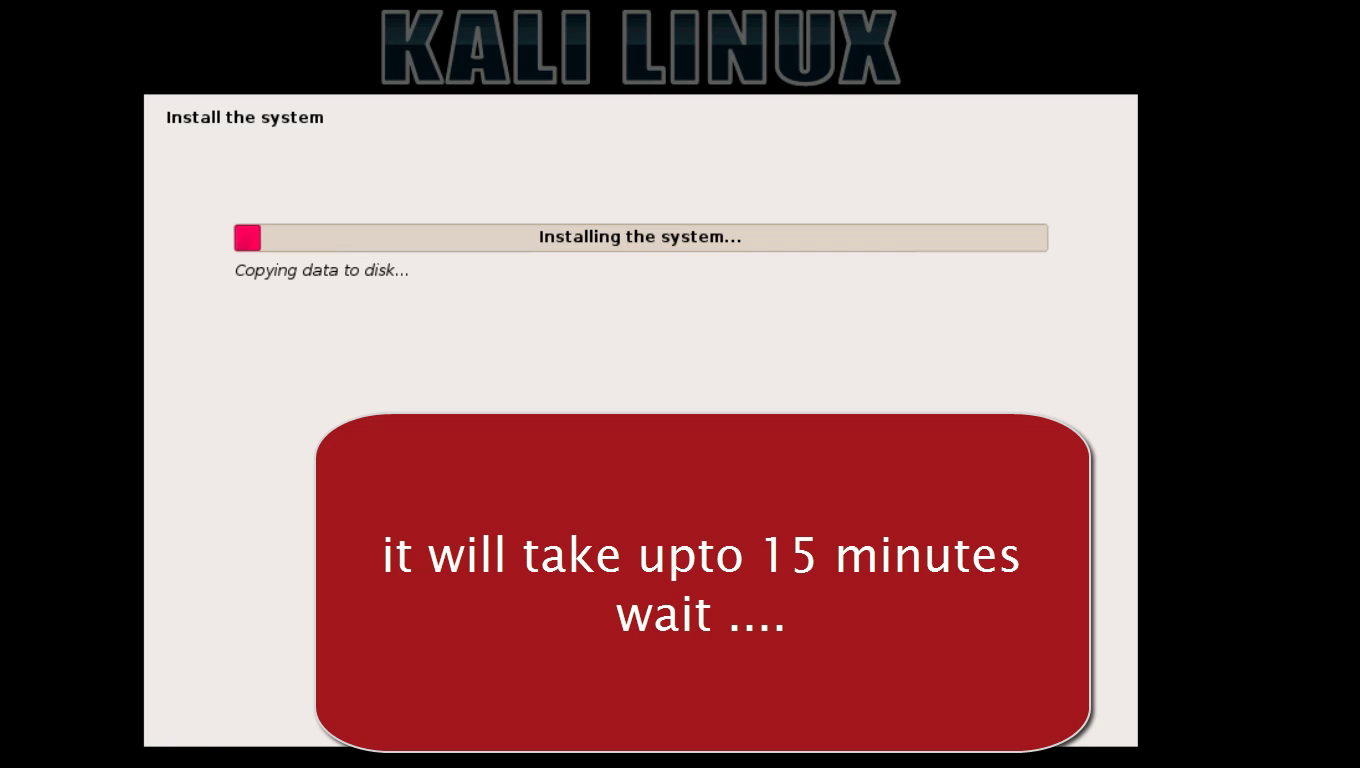
10 : wait until installer finish copying files setting system

kali-linux-19
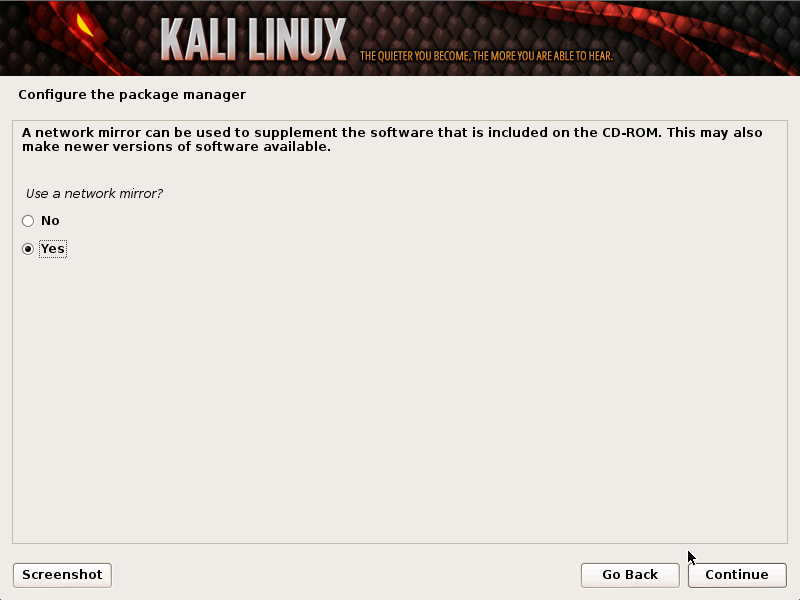
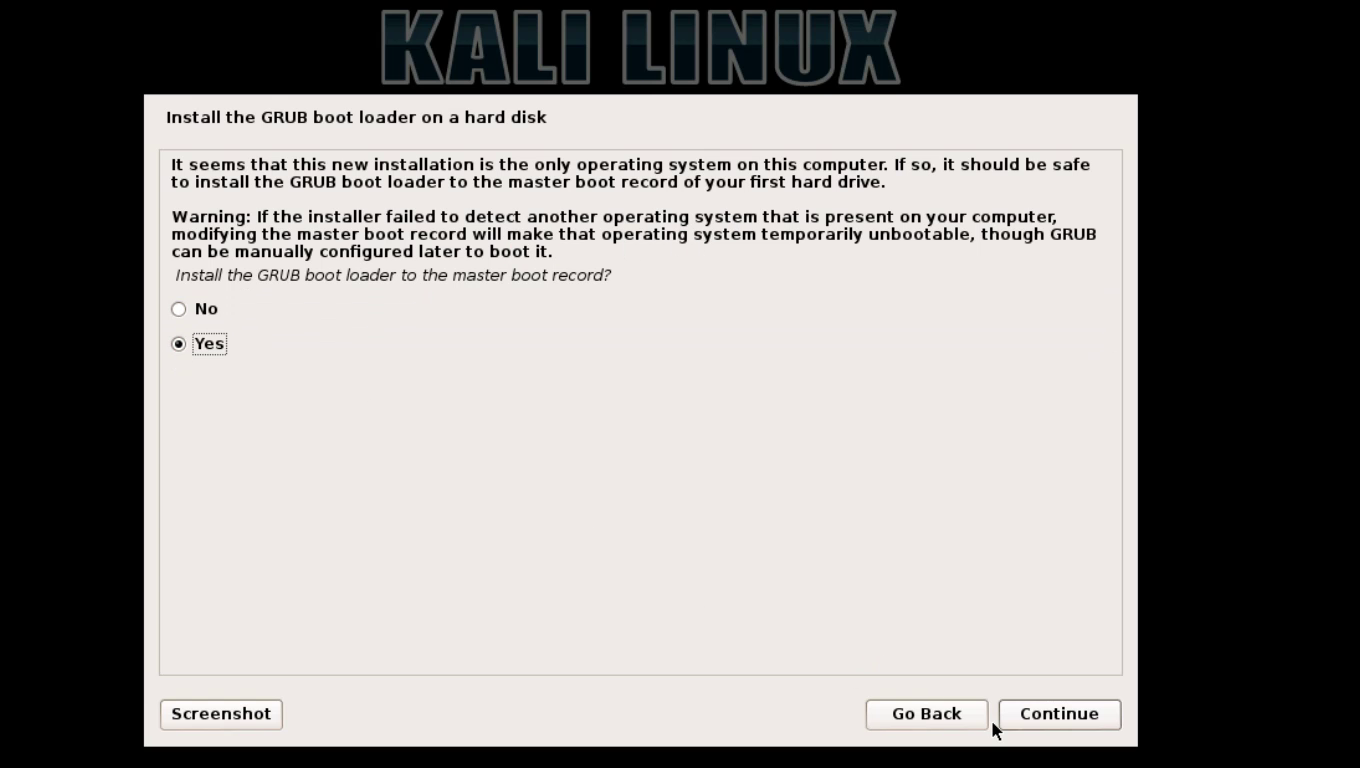
11 :  set network mirror and set boot-loader ( very important )
mirror
kali-linux-21
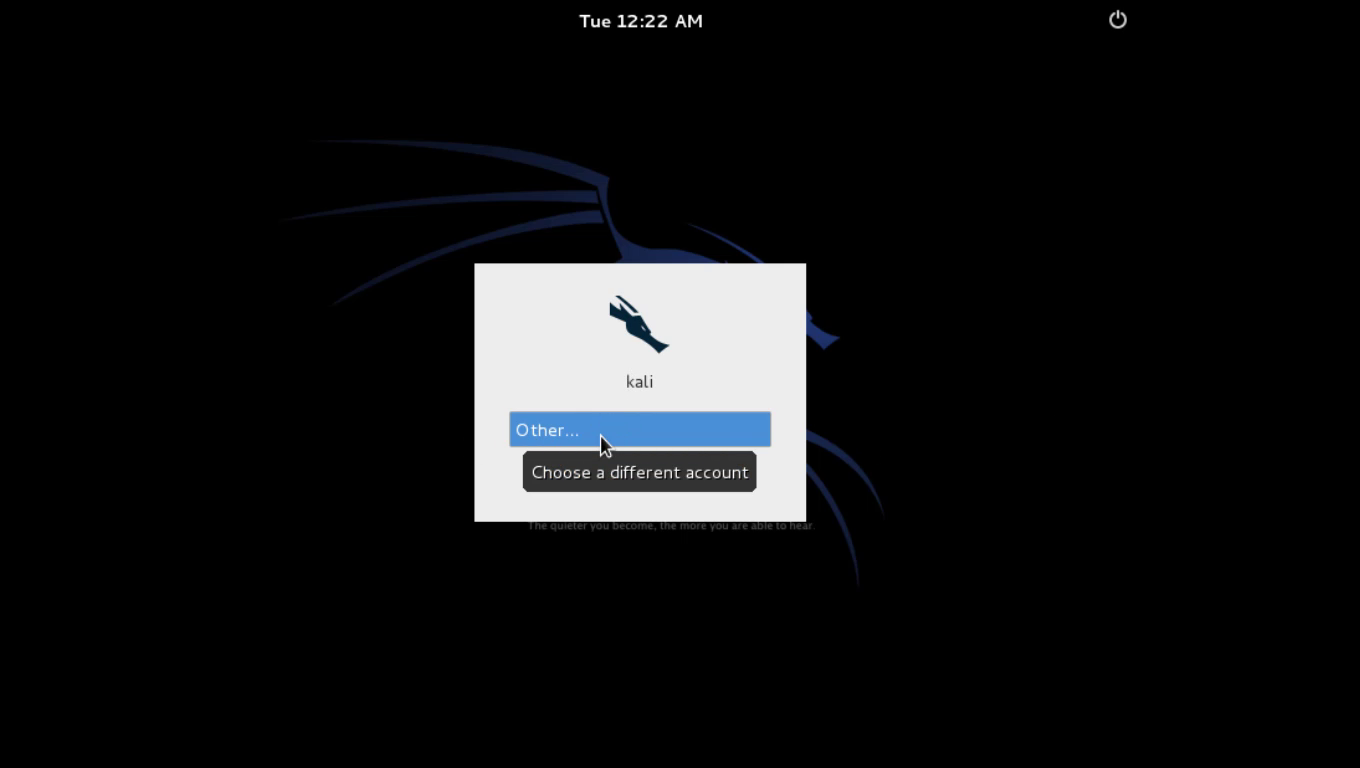
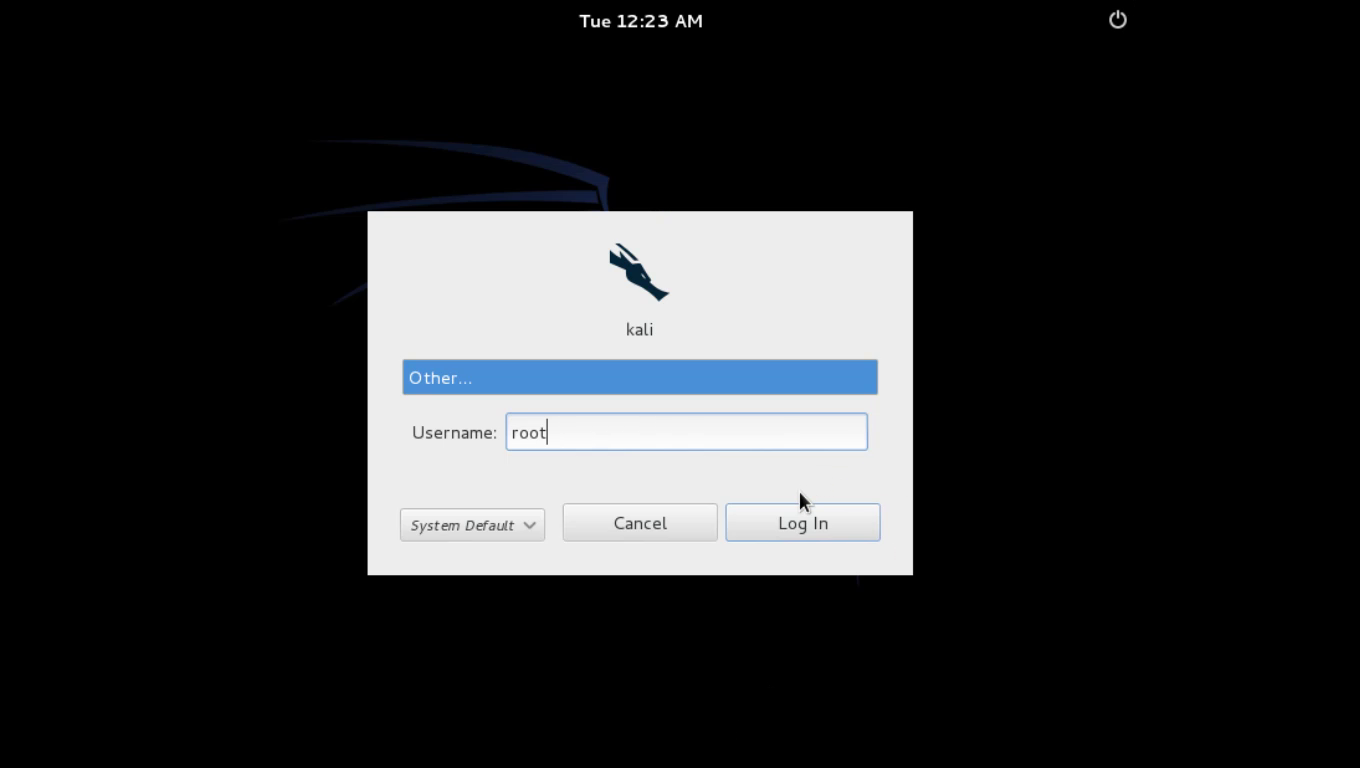
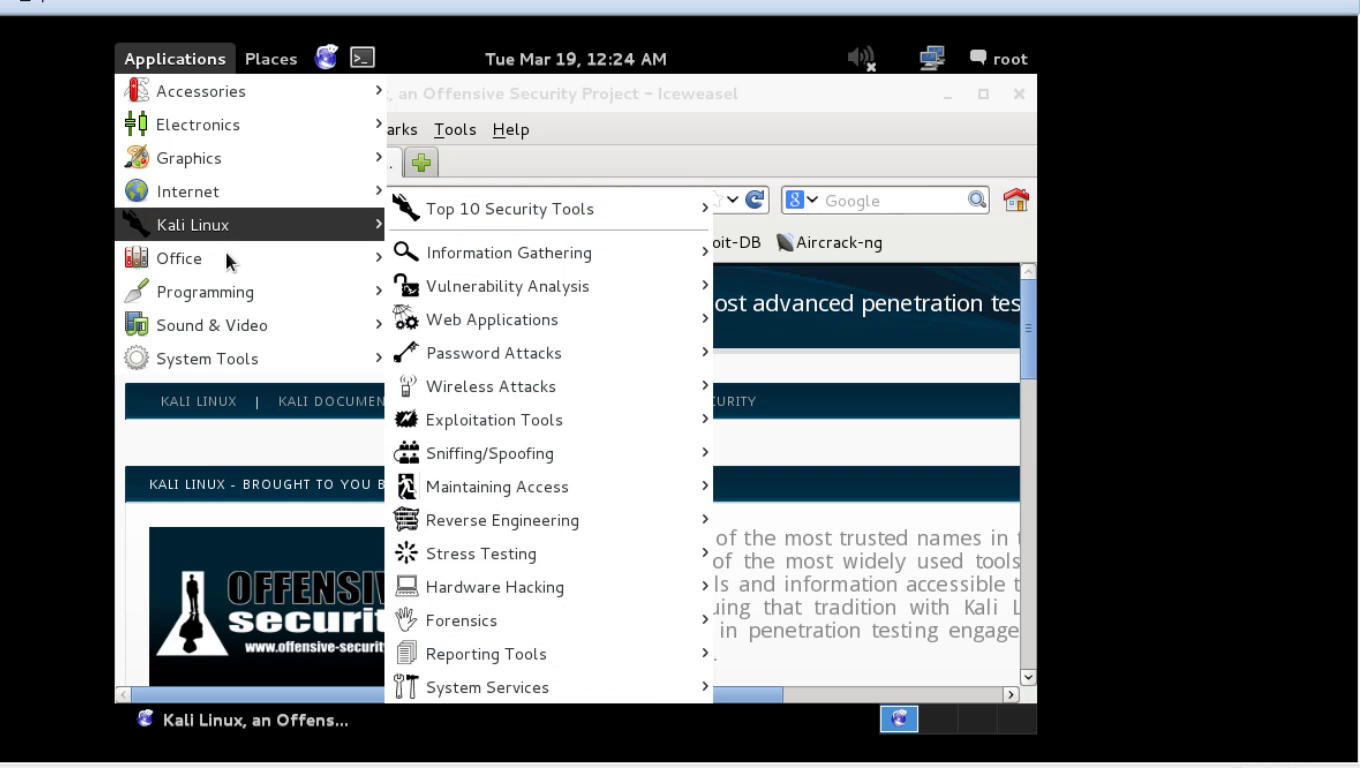
12 : after installation restart and login with username ” root ” and password ( what you set at step 6 )
kali-linux-23
kali-linux-24

kali linux
kali linux

How to Install Backtrack Live to USB

Steps


1
Plug in your USB Drive (Minimum USB Drive capacity 2 GB)

  1. Install Backtrack Live to USB Step 1.jpg
    1
    Plug in your USB Drive (Minimum USB Drive capacity 2 GB)
    Ad
  2. Install Backtrack Live to USB Step 2.jpg
    2
    Format the USB drive to FAT32
  3. Install Backtrack Live to USB Step 3.jpg
    3
    3.Download Unetbootin from http://unetbootin.sourceforge.net/
  4. Install Backtrack Live to USB Step 4.jpg
    4
    Start Unetbootin and select diskimage (use the backtrack-final ISO)
  5. Install Backtrack Live to USB Step 5.jpg
    5
    Select "Backtrack" and version from drop down list. Select your USB drive and click “OK” for creating a bootable BackTrack USB drive. Unetbootin will download the ISO and burn it on usb. (Note: If you have already downloaded the ISO file to pc, you can choose ISO option in unetbootin and select the ISO file in pc.
  6. Install Backtrack Live to USB Step 6.jpg
    6
    Log into BackTrack with the default username and password root /toor.

How to Setup Windows XP from USB drive?


Step1: Prepping BartPE:
First we’ll prep the USB drive we’ll be using for booting. This is by far the largest step in the process, though it shouldn’t be difficult for anyone to follow. It requires a functional Windows system.
  1. Download BartPE builder from http://www.nu2.nu/pebuilder/
  2. Install BartPE. We’ll be assuming that you install to C:\pebuilder.
  3. Start PE Builder from the Start Menu. Point "Source:" to the location of your Windows XP setup files containing SP3.
  4. Make sure the "Output:" is set to "BartPE". 
  5. Set "Media output" as "Create ISO image" and filename as "c:\pebuilder\pebuilder.iso".
  6. Hit "Build". 
  7. When it's done building, image file "c:\pebuilder\pebuilder.iso" should be created properly.

Step2: Create XP Bootable USB Drive:
  1. Start PowerISO (v4.8 or newer version, download here).
  2. Insert the USB drive you intend to boot from.
  3. Choose the menu "Tools > Create Bootable USB Drive". The "Create Bootable USB Drive" dialog will popup. If you are using Windows Vista or Windows 7 operating system, you need confirm the UAC dialog to continue.
  4. In "Create Bootable USB Drive" dialog, click "..." button to open the iso file "c:\pebuilder\pebuilder.iso".
  5. Select the correct USB drive from the "Destination USB Drive" list if multiple USB drives are connected to the computer.
  6. Choose the proper writing method. "USB-HDD" is recommended.
  7. Click "Start" button to start creating bootable USB drive.
  8. When it's done, copy the Windows XP setup files to the USB drive. Please note that you'll only need the i386 folder. 
If no errors occurred in the above process, you should now be all set to setup Windows xp from USB drive!

Step 3: Configuring the BIOS:
You should now reboot and go into the BIOS configuration to boot from USB. Instructions for doing so wildly from system to system, but generally entail the following:
  1. Reboot the system.
  2. While booting (before Windows starts loading), get into the BIOS configuration screen by hitting something like F1, F2, Delete or Escape. Hotkey instructions are generally provided on the screen.
  3. Go to the section that contains your boot devices.
  4. With your USB drive plugged in, the USB drive should be listed. If it isn’t, your system might not support booting from USB. Assuming that it is supported (as is the case with virtually all modern hardware), promote your USB drive to the primary boot device.
  5. Exit from the BIOS configuration, saving all changes.
If you’re completely new to BIOS configuration, BIOS for Beginners over at Tom’s Hardware might be a good primer. Be aware though, that you can seriously screw up your system by providing incorrect settings!

Step 4: Booting into BartPE:
Assuming that you properly configured your BIOS and your USB drive supports booting,  BartPE should now load. Depending on the speed of your USB drive, this may take a while.
If it isn’t working, then double-check the following before making a scene:
  • Is your BIOS properly configured for booting from the USB device? (Is the USB device listed and does it have top priority?)
  • Have you correctly prepared the USB drive in step one? (Restart the procedure.)
  • Does your USB drive properly support being booted from? (Try another one!)

Step 5: Prepping the Hard Disk:
You need to make sure that your hard drive is partitioned and formatted properly. Especially if you've had Linux or some other operating system on it, you'll need to repartition and format it. BartPE contains DiskPart for disk partitioning and A43 File Manager to format your drive.
If you are sure that your hard drive is set up properly (i.e. it has only run Windows, it contains a valid FAT or NTFS partition) then you can safe yourself the hassle and skip this step.
To repartition (This procedure will destroy any data on the hard drive):
  1. From the Go menu, navigate to DiskPart.
  2. Enter the commands needed to repartition your drive. For example, try the following: select disk 0 (select the first disk), clean (purges the entire drive, essentially resetting it), create partition primary (creates a single partition from the entire disk), assign (assign the partition a drive letter), exit (quits DiskPart).
To format (This procedure will destroy any data on the hard drive):
  1. From the Go menu, navigate to the A43 File Manager.
  2. Right-click on the target drive (e.g. C:) and click Format. Should be self-explanatory.

Step 6: Launching Windows XP Setup from USB drive:
With your drive all ready, you can now launch the Windows XP setup with a few custom parameters. Let's assume that the files are available at X:\i386.
Plugging in a device now won’t work. Remember that all USB devices will need to be plugged in right from the start while using BartPE.
Run the following command:
  1. Run X:\i386\winnt32.exe /syspart:C: /tempdrive:C: /makelocalsource. Replace C: with the drive you want to install Windows to.
  2. Proceed with the installation. When asked to convert the installation volume to NTFS, answer No. The setup program incorrectly believes that your USB drive (which is formatted as FAT) needs conversion.
The setup program will then silently close, which might make you think that something went wrong. Don't worry though.

Step 7: Continue Windows XP Setup from Hard disk:
  1. Reboot your system.
  2. Unplug USB drive during post stage.
  3. Change your BIOS settings back to boot from hard disk again as needed.
  4. You can now continue to finish setting up Windows XP.

Note: The above guide works with Windows XP only. For Windows 7 / Windows 8 / Windows Vista please refer to another guide athttp://www.poweriso.com/tutorials/how-to-make-win7-bootable-usb-drive.htm 

How to create a bootable Linux USB drive using UNetbootin

Introduction

I am writing this guide because I quite often describe the process of creating bootable Linux USB drives in the reviews that I write.

This short guide will enable me to concentrate more on the features of a distribution and less on how you create a bootable live USB drive.

What is UNetbootin?

UNetbootin is a cross platform tool that extracts the contents of an ISO file to a USB drive and makes that USB drive bootable.

You are therefore then able to try out various versions of Linux simply by downloading different ISO files and using UNetbootin to refresh the USB drive with the ISO file of choice.

Where can you get UNetbootin?

To download UNetbootin visit http://unetbootin.sourceforge.net/.


If you are using Linux you can quite often find UNetbootin within the repositories of the distribution you are using and many distributions have it installed by default.

To run UNetbootin

If you are using Windows double click on the downloaded file.

If you are using Linux with a graphical desktop then there will likely be a menu option available for UNetbootin. If you are using Ubuntu it should appear in the Dash. Alternatively open a terminal and type sudo unetbootin.

Using UNetbootin


There are 2 basic ways to use UNetbootin. The first is to select a distribution from the list and let UNetbootin download the version of Linux you want to install and the second is to download the image of the distribution you wish to install and select it for installation to the USB drive.

The best method as far as I am concerned is to download the media yourself from the download page for the distribution you are using. This means you get the full choice of distributions available and you will get the latest version.

Once you have downloaded the ISO for the file you wish to install to USB select the "DiskImage" radio button.

Now click on the button with three dots on it.


Find the ISO file that you downloaded and click "Open".

Make sure that you have inserted your USB drive and make sure the "Drive:" dropdown box is pointing at your USB drive.

Click "OK" to start installing to the USB drive.

Note: If the drive is not blank to begin with that UNetbootin will not wipe the drive first. Format the drive yourself before you start.

Summary

When the files have finished installing to the USB drive reboot your computer leaving the drive inserted and your system should boot to a menu where you can choose how to run the Linux distribution you have chosen.

Thankyou for reading

How To Create bootable on power iso

Step1: Create Bootable USB Drive:
  1. Start PowerISO (v4.8 or newer version, download here).
  2. Insert the USB drive you intend to boot from.
  3. Choose the menu "Tools > Create Bootable USB Drive". The "Create Bootable USB Drive" dialog will popup. If you are using Windows Vista or Windows 7 / 8 operating system, you need confirm the UAC dialog to continue.
  4. In "Create Bootable USB Drive" dialog, click "..." button to open the iso file of Windows 7 or Windows 8.
  5. Select the correct USB drive from the "Destination USB Drive" list if multiple USB drives are connected to the computer.
  6. Choose the proper writing method. "USB-HDD" is recommended.
  7. Click "Start" button to start creating windows 7 / 8 bootable USB drive.
If no errors occurred in the above process, you should now be all set to setup Windows 7 / 8 from USB drive!

Step 2: Configuring the BIOS:
You should now reboot and go into the BIOS configuration to boot from USB. Instructions for doing so wildly from system to system, but generally entail the following:
  1. Reboot the system.
  2. While booting (before Windows starts loading), get into the BIOS configuration screen by hitting something like F1, F2, Delete or Escape. Hotkey instructions are generally provided on the screen.
  3. Go to the section that contains your boot devices.
  4. With your USB drive plugged in, the USB drive should be listed. If it isn’t, your system might not support booting from USB. Assuming that it is supported (as is the case with virtually all modern hardware), promote your USB drive to the primary boot device.
  5. Exit from the BIOS configuration, saving all changes.
If you’re completely new to BIOS configuration, BIOS for Beginners over at Tom’s Hardware might be a good primer. Be aware though, that you can seriously screw up your system by providing incorrect settings!

Step 3: Booting and setup windows 7 / Windows 8 from USB drive:
Assuming that you properly configured your BIOS and your USB drive supports booting,  Windows 7 / 8 setup should now load. Depending on the speed of your USB drive, this may take a while.
If it isn’t working, then double-check the following before making a scene:
  • Is your BIOS properly configured for booting from the USB device? (Is the USB device listed and does it have top priority?)
  • Have you correctly prepared the USB drive in step one? (Restart the procedure.)
  • Does your USB drive properly support being booted from? (Try another one!)
Note: The above guide works with Windows Vista / Windows 7 / Windows 8 only. For Windows XP with SP2 or SP3 please refer to another guide athttp://www.poweriso.com/tutorials/how-to-make-winxp-bootable-usb-drive.htm .

Created By:OnlineUstaad.com